[Android] 리스트뷰 Listview 기초(생성부터 적용까지)
보통 recycler view를 많이 쓰는데, Listview를 알면 recycler view를 조금 더 쉽게 배울 수 있어서 List view를 먼저 공부하는 중이다.
1. Activity 화면(XML)에 ListView 배치 + id 부여
=> 아직 아무것도 안 나옴!! 밑 XML은 어댑터를 추가하면 나옴(사진은 어댑터 추가한 상태)
<?xml version="1.0" encoding="utf-8"?>
<LinearLayout xmlns:android="http://schemas.android.com/apk/res/android"
    xmlns:app="http://schemas.android.com/apk/res-auto"
    xmlns:tools="http://schemas.android.com/tools"
    android:layout_width="match_parent"
    android:layout_height="match_parent"
    android:orientation="vertical"
    tools:context=".MainActivity">

    <ListView
        android:id="@+id/studentListView"
        android:layout_width="match_parent"
        android:layout_height="match_parent"/>
</LinearLayout>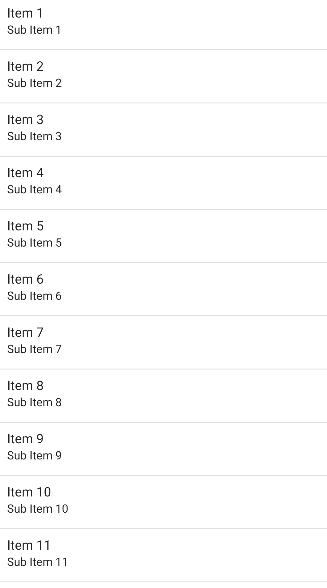
2. Listview가 뿌려줄 데이터들을 표현하는 데이터 클래스 작업(없으면 새로 만들기)
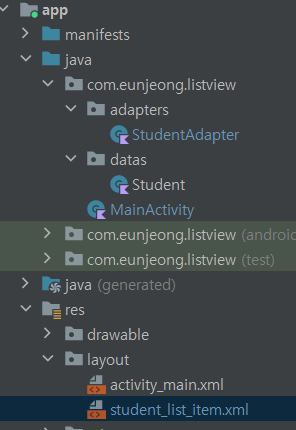
- 데이터클래스들은 별도로 datas 패키지에 관리(없다면 생성)
- Kotlin File/Class로 데이터 클래스 생성 => 이름 대문자로 시작하도록
- 데이터들을 저장하기 위한 멤버변수 var로 생성


package com.eunjeong.listview.datas

// 학생 하위정보 - 이름, 출생년도
class Student(
    val name: String, val birthYear: Int) {
} // 나중에 바꿀 수도
3. 데이터가 뿌려질(한 줄에 해당하는) 모양을 XML로 layout 폴더에 추가
- layout 폴더 우클릭 > New > layout resource file 선택
- 이름짓기 : 그림파일처럼 영어 소문자 + _ (언더바) + 숫자 조합
- ~~_list_item 양식이 일반적
- 화면을 그리는 것과 같은 요령으로 한 줄에 해당하는 모양을 XML로 작성
<?xml version="1.0" encoding="utf-8"?>
<LinearLayout xmlns:android="http://schemas.android.com/apk/res/android"
    android:layout_width="match_parent"
    android:layout_height="match_parent"
    android:orientation="vertical">

    <LinearLayout
        android:layout_width="match_parent"
        android:layout_height="wrap_content"
        android:orientation="horizontal"
        android:gravity="center"
        android:padding="10dp">

        <TextView
            android:layout_width="wrap_content"
            android:layout_height="wrap_content"
            android:text="학생이름"
            android:textColor="#000000"
            android:textSize="17sp"/>

        <TextView
            android:layout_width="wrap_content"
            android:layout_height="wrap_content"
            android:text="(1999년생)"
            android:layout_marginLeft="5dp"/>
    </LinearLayout>

</LinearLayout>
4. Adapter 클래스 생성 => 데이터클래스 + XML을 조합해서 => Listview에 뿌려주는 역할(기초 뼈대 작업)
- 기초뼈대작업(일단 기본 XML만 화면에 등장) - 메뉴얼 따라하기/ 실제 각 줄의 데이터 반영작업(각 줄에서 실제 학생 이름 등 반영) - 알고리즘 작성: 상황에 맞게 데이터를 가공해서 출력해야함
- 어댑터들은 adapters 패키지에 따로 관리(없다면 생성)
- 어댑터 클래스도 새 Kotlin 클래스로 생성
- 이름짓기 : ~~Adapter로 짓자
- 이 클래스가 ArrayAdapter를 상속 받는다고 명시하자
- ArrayAdapter<뿌려줄데이터클래스>()
- ArrayAdpater는 기본 생성자() 지원X => 에러 발생
- 어댑터를 만들 때 생성자에서 재료를 받아다 부모에게 넘겨줘야 에러 해결
- 어댑터의 주 생성자에서 필요한 재료 받기
class 어댑터클래스(
	val mContext: Context,
    val resId: Int,
    val mList: ArrayList<뿌려져야할 데이터 클래스> )
=> 주 생성자에서 받은 재료를 순서대로 부모에게 넘기자.
ArrayAdapter<데이터클래스>(mContext, resId, mList)
- XML을 가지고 => 객체로 변환해주는(화면에 뿌리도록 도와주는) 변수를 멤버변수로 생성
val inf = LayoutInflater.from(mContext)- getView 함수를 오버라이딩 => 기본모양X, 우리가 원하는 모양이 뿌려지게 하려고 오버라이딩
- ConvertView 변수를 => var tempRow에 옮겨담아서 => null인 경우에는 새로 inflate 해서 담자.
var tempRow = convertView
if (tempRow == null) {
	tempRow = inf.inflate(R.layout.한줄xml, null)
}- 진짜 row를 만들어서, tempRow가 절대 null이 아니다라고 하면서 대입.
=> val row = tempRow!! - 최종적으로 리스트뷰에 이 row를 뿌려달라고 리턴처리,
=> return row - Adapter Code
package com.eunjeong.listview.adapters

import android.content.Context
import android.view.LayoutInflater
import android.view.View
import android.view.ViewGroup
import android.widget.ArrayAdapter
import com.eunjeong.listview.R
import com.eunjeong.listview.datas.Student

class StudentAdapter(
    val mContext : Context,
    val resId: Int,
    val mList: ArrayList<Student>) : ArrayAdapter<Student>(mContext, resId, mList){ //어떤타입의 아이디어 받을지<아이디어>

    val inf = LayoutInflater.from(mContext)

    override fun getView(position: Int, convertView: View?, parent: ViewGroup): View {

        var tempRow = convertView
        if (tempRow == null) {
            tempRow = inf.inflate(R.layout.student_list_item, null)
        }

        val row = tempRow!!

        return row
    }
}
5. Activity에서 실제 목록을 담아줄 ArrayList를 만들고, 그 안에 실제 데이터들을 담아주자.
- Activity의 멤버변수로 ArrayList 생성
val 목록변수이름 = ArrayList<뿌려줄데이터클래스>()- 실제 뿌려줄 데이터들을 ArrayList 변수에 추가해주자
- 실무에서는 서버에서 내려주는 목록 데이터를 받아서 ArrayList에 담아준다.
- 지금은 직접 생성
package com.eunjeong.listview

import androidx.appcompat.app.AppCompatActivity
import android.os.Bundle
import com.eunjeong.listview.datas.Student

class MainActivity : AppCompatActivity() {

    val mStudentList = ArrayList<Student>()

    override fun onCreate(savedInstanceState: Bundle?) {
        super.onCreate(savedInstanceState)
        setContentView(R.layout.activity_main)

        mStudentList.add( Student("은딩", 2000) )
        mStudentList.add( Student("은조", 2001) )
        mStudentList.add( Student("하이", 1999) )
        mStudentList.add( Student("승승", 1987) )
        mStudentList.add( Student("은혜", 1980) )
        mStudentList.add( Student("재석", 1970) )
        mStudentList.add( Student("석진", 2007) )
        mStudentList.add( Student("유진", 2002) )
    }
}
6. 만들어둔 Adapter 클래스를 Activity에 있는 Listview와 연결
- 멤버변수로 생성해둘 때, 초기화를 나중에 한다고 해두자
=> lateinit var 어댑터변수 : 어댑터클래스이름
lateinit var mAdapter : StudentAdapter- adapter 클래스를 객체화(5.에서 만든 목록과 연결) => onCreate 내부에서.
=> 어댑터변수 = 어댑터클래스(this, R.layout.~_list_item, 목록변수이름)
mAdapter = StudentAdapter(this, R.layout.student_list_item, mStudentList)- 객체화 된 adapter 변수를 => Listview의 어댑터로 지정
=> 리스트뷰변수.adapter = 어댑터변수
viewBinding.studentListView.adapter = mAdapter+) 여기까지 작업해야 일단 리스트뷰에 뭔가 나타나기 시작한다.
=> 실제 데이터들은 반영되지 않은 상태
7. 실제 데이터가 목록에 반영되도록, Adapter 클래스의 getView 함수 내부 수정.
- row변수의 내용물을 코틀린단에서 변경해주자.
- row변수 내부의 UI들을 id를 붙여서 코틀린으로 가져오자.
=> ex. val nameTxt = row.findViewById<TextView>(R.id.nameTxt) - (최초 1회만 코딩) mList 내부에서, position에 맞는 데이터 가져오기
=> ex. val data = mList[position] - studentAdapter.kt에 추가
val studentData = mList[position]
val nameTxt = row.findViewById<TextView>(R.id.nameTxt)
val birthYearTxt = row.findViewById<TextView>(R.id.birthYearTxt)
nameTxt.text = studentData.name
birthYearTxt.text = "(${studentData.birthYear}년생)"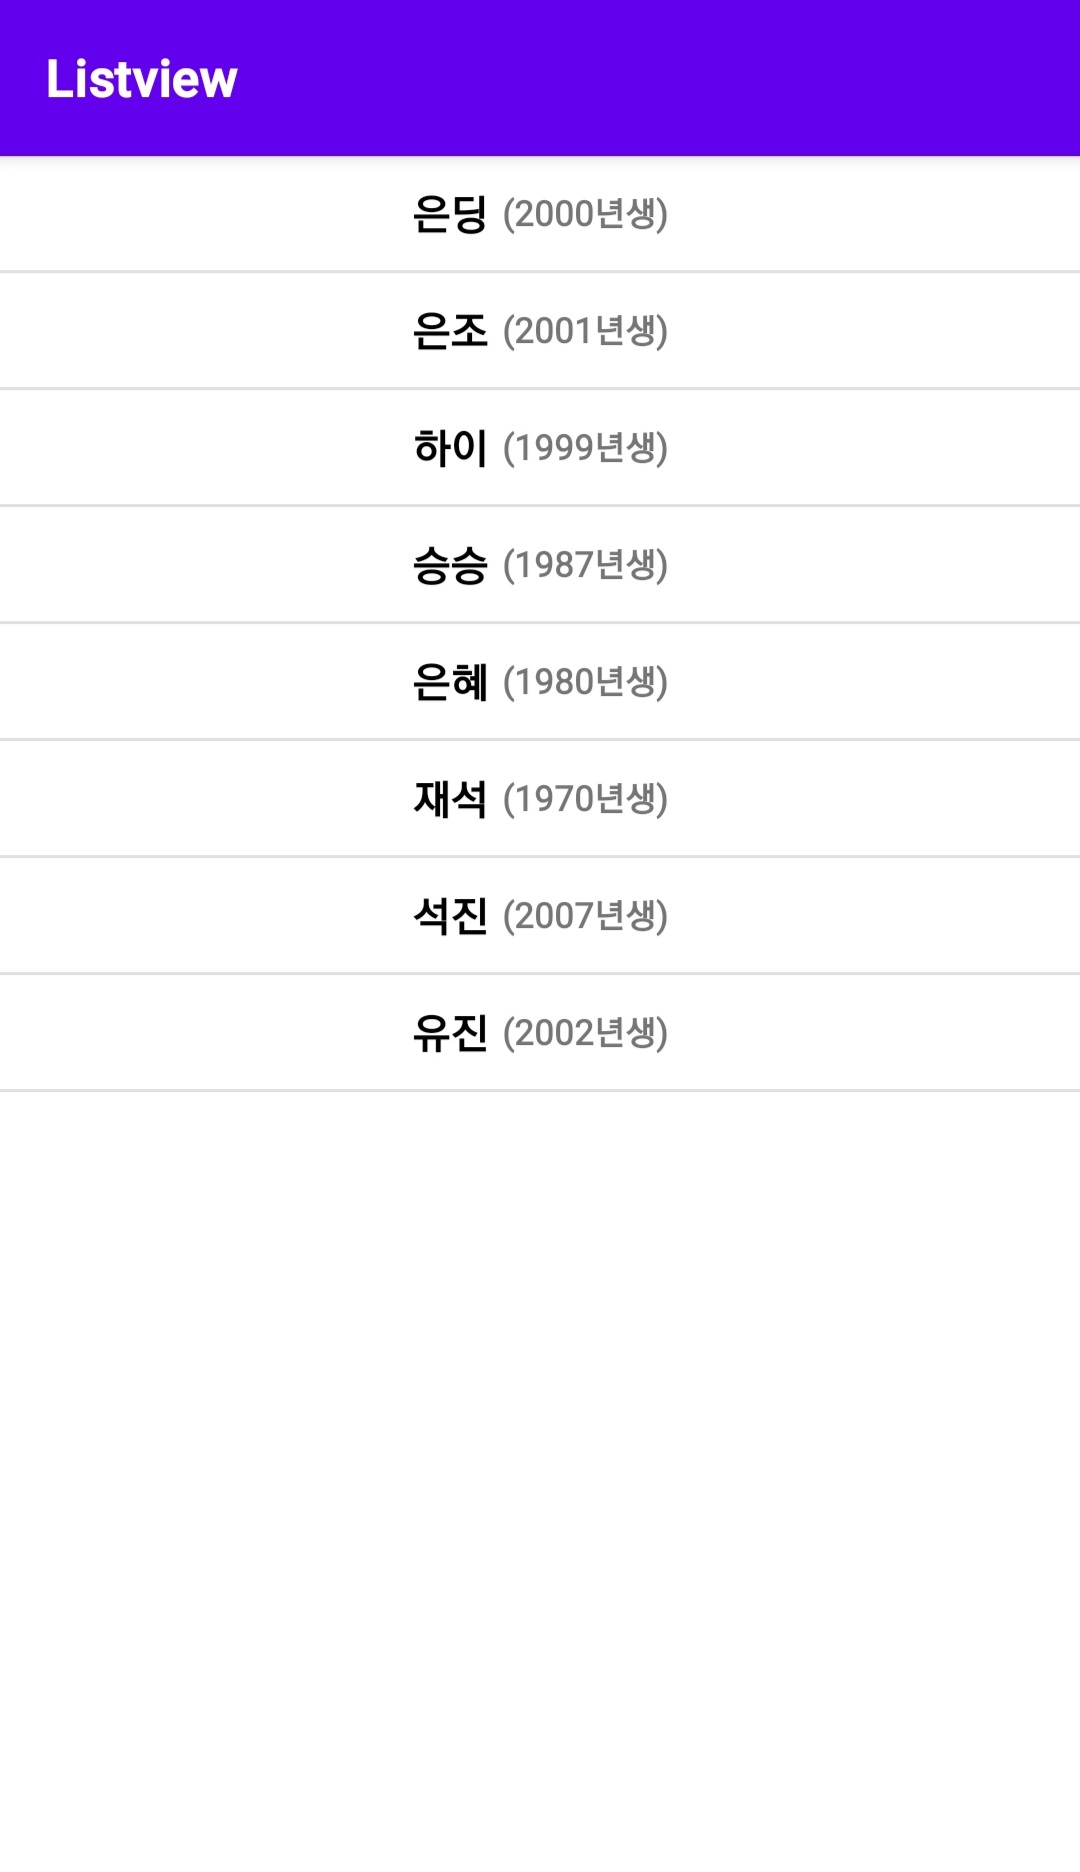
- data 내부의 값 / 함수 등을 활용해서 => 표시할 자리에 반영(알고리즘 고민)
ex) 나이 추가 해보기
//출생년도를 가지고 => (2022년 한국식)나이로 변환해서 보여주기.
val koreanAge = 2022 - studentData.birthYear + 1
birthYearTxt.text = "(${studentData.birthYear}년생, ${koreanAge}세)"
최종 코드
student_list_item.xml
<?xml version="1.0" encoding="utf-8"?>
<LinearLayout xmlns:android="http://schemas.android.com/apk/res/android"
    android:layout_width="match_parent"
    android:layout_height="match_parent"
    android:orientation="vertical">

    <LinearLayout
        android:layout_width="match_parent"
        android:layout_height="wrap_content"
        android:orientation="horizontal"
        android:gravity="center"
        android:padding="10dp">

        <TextView
            android:id="@+id/nameTxt"
            android:layout_width="wrap_content"
            android:layout_height="wrap_content"
            android:text="학생이름"
            android:textColor="#000000"
            android:textSize="17sp"/>

        <TextView
            android:id="@+id/birthYearTxt"
            android:layout_width="wrap_content"
            android:layout_height="wrap_content"
            android:text="(1999년생)"
            android:layout_marginLeft="5dp"/>
    </LinearLayout>

</LinearLayout>
activity_main.xml
<?xml version="1.0" encoding="utf-8"?>
<LinearLayout xmlns:android="http://schemas.android.com/apk/res/android"
    xmlns:app="http://schemas.android.com/apk/res-auto"
    xmlns:tools="http://schemas.android.com/tools"
    android:layout_width="match_parent"
    android:layout_height="match_parent"
    android:orientation="vertical"
    tools:context=".MainActivity">

    <ListView
        android:id="@+id/studentListView"
        android:layout_width="match_parent"
        android:layout_height="match_parent"/>
</LinearLayout>
StudentAdapter.kt
package com.eunjeong.listview.adapters

import android.content.Context
import android.view.LayoutInflater
import android.view.View
import android.view.ViewGroup
import android.widget.ArrayAdapter
import android.widget.TextView
import com.eunjeong.listview.R
import com.eunjeong.listview.datas.Student

class StudentAdapter(
    val mContext : Context,
    val resId: Int,
    val mList: ArrayList<Student>) : ArrayAdapter<Student>(mContext, resId, mList){ //어떤타입의 아이디어 받을지<아이디어>

    val inf = LayoutInflater.from(mContext)

    override fun getView(position: Int, convertView: View?, parent: ViewGroup): View {
        var tempRow = convertView
        if (tempRow == null) {
            tempRow = inf.inflate(R.layout.student_list_item, null)
        }

        val row = tempRow!!

        val studentData = mList[position]
        val nameTxt = row.findViewById<TextView>(R.id.nameTxt)
        val birthYearTxt = row.findViewById<TextView>(R.id.birthYearTxt)
        nameTxt.text = studentData.name

        //출생년도를 가지고 => (2022년 한국식)나이로 변환해서 보여주기.
        val koreanAge = 2022 - studentData.birthYear + 1
        birthYearTxt.text = "(${studentData.birthYear}년생, ${koreanAge}세)"

        return row
    }
}
Student.kt
package com.eunjeong.listview.datas

// 학생 하위정보 - 이름, 출생년도
class Student(
    val name: String, val birthYear: Int) {
} // 나중에 바꿀 수도
MainActivity.kt
package com.eunjeong.listview

import androidx.appcompat.app.AppCompatActivity
import android.os.Bundle
import com.eunjeong.listview.adapters.StudentAdapter
import com.eunjeong.listview.databinding.ActivityMainBinding
import com.eunjeong.listview.datas.Student

class MainActivity : AppCompatActivity() {

    val mStudentList = ArrayList<Student>()

    lateinit var mAdapter : StudentAdapter

    private lateinit var viewBinding: ActivityMainBinding
    override fun onCreate(savedInstanceState: Bundle?) {
        super.onCreate(savedInstanceState)
        viewBinding = ActivityMainBinding.inflate(layoutInflater)
        setContentView(viewBinding.root)

        mStudentList.add( Student("은딩", 2000) )
        mStudentList.add( Student("은조", 2001) )
        mStudentList.add( Student("하이", 1999) )
        mStudentList.add( Student("승승", 1987) )
        mStudentList.add( Student("은혜", 1980) )
        mStudentList.add( Student("재석", 1970) )
        mStudentList.add( Student("석진", 2007) )
        mStudentList.add( Student("유진", 2002) )

        mAdapter = StudentAdapter(this, R.layout.student_list_item, mStudentList)

        viewBinding.studentListView.adapter = mAdapter

    }
}
참고 : class101+ 코딩티처지니 강의